
Want to reach your Windows 11 PC from another machine? If yes, then you will get the best way to do it. The remote desktop function will let users do that. It does not matter whether you work from home, lend a hand to a family member, or grab your files while you’re traveling. This option gives you a secure kind of control over your PC from just about anywhere. In this guide, you’ll see how to turn on a remote desktop in Windows 11 with clear, step-by-step instructions. So let’s get started.
What Is a Remote Desktop?
Remote Desktop is a built-in Windows feature. It helps you reach your PC from another device. Additionally, after you get connected, you can open files and folders, run software, tweak settings, and handle annoying issues. Lastly, it operates in a nearly similar way to being seated right in front of your computer, just with the difference that you’re remote.
Requirements Before You Start
Before you turn on Remote Desktop, just double-check a few things, because you know it’s never as simple.
- Firstly, make sure you’re on Windows 11 Pro, Enterprise, or Education.
- Secondly, your PC is actually online.
- Thirdly, you need admin access on that device; otherwise it won’t work.
- Lastly, keep the computer powered on too, not sleeping, not off.
Note: Windows 11 Home can still connect to other PCs , however it can’t act as the host for Remote Desktop connections.
Steps to Enable Remote Desktop on Windows 11
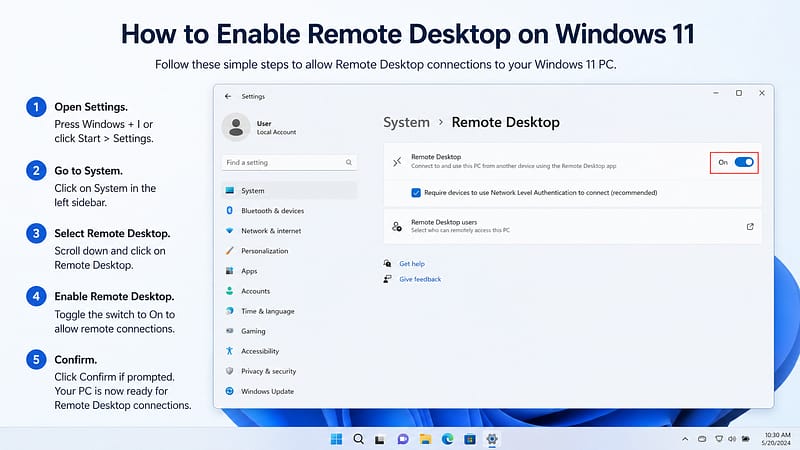
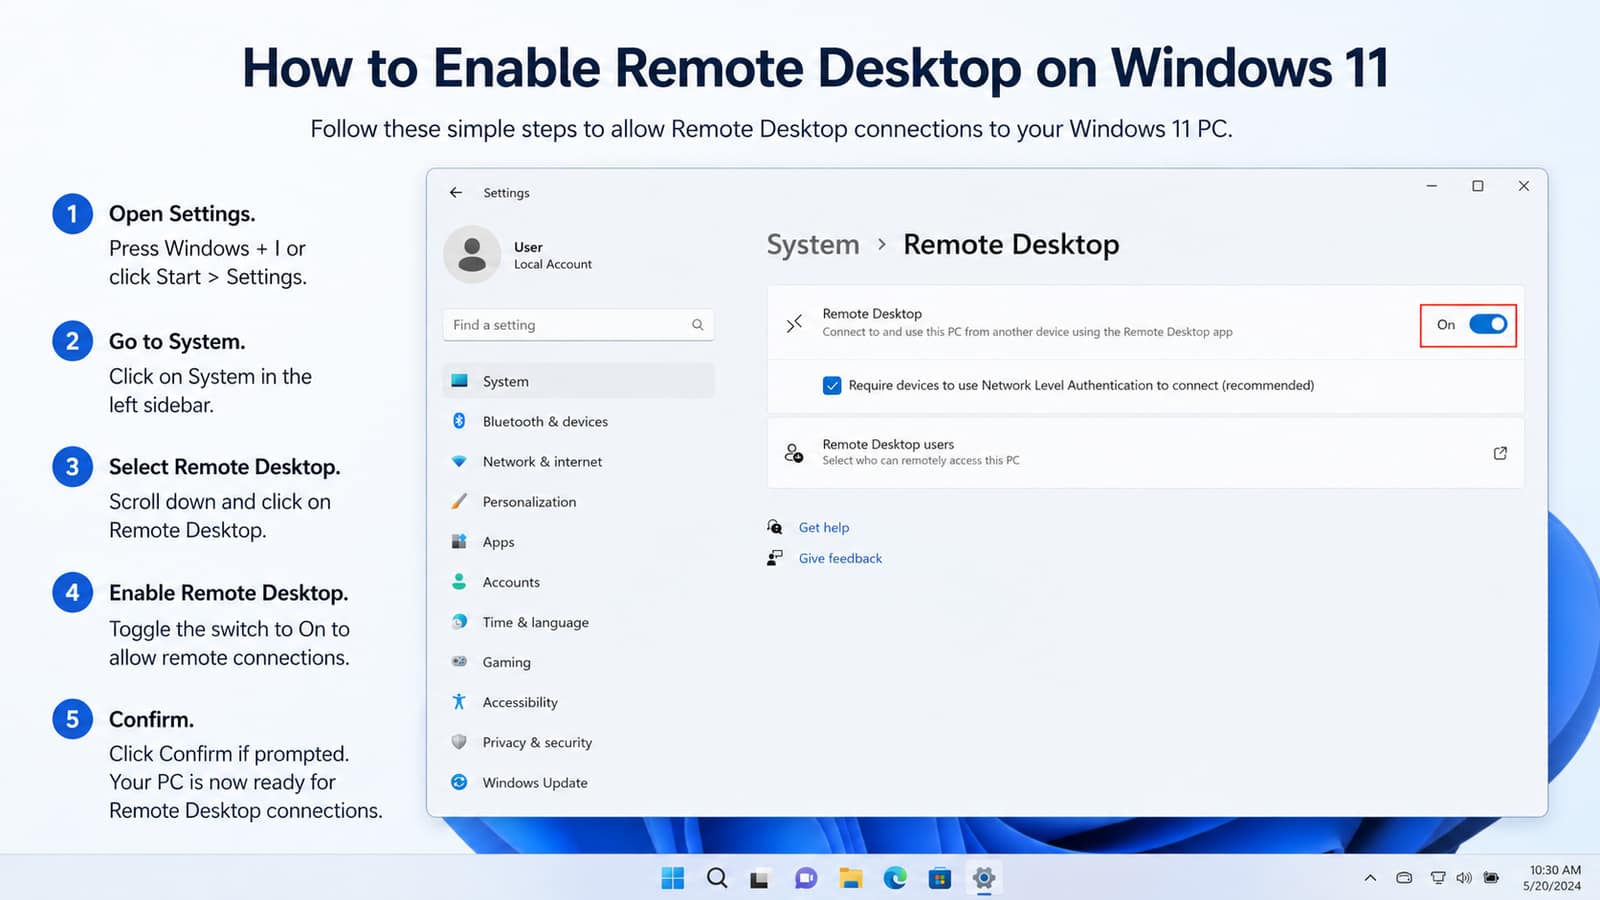
Step 1: Open Windows Settings
- First, hit the Start menu and open Settings.
- After that, tap System from the left sidebar.
- Then keep scrolling down and click Remote Desktop.
Step 2: Turn On Remote Desktop
- Second, you’ll notice a switch that says Remote Desktop.
- Flip it to ON.
- Windows might pop up asking you to confirm; press the Confirm button.
- After that, the Remote Desktop should be turned on and ready to use.
Step 3: Note Your PC Name
- Third, after you enable the feature, Windows shows your PC name.
- Write this down or just copy it somewhere safe.
- You will need it later when connecting from another device.
Step 4: Keep Your PC Awake
- Fourthly, if your computer goes to sleep, you won’t be able to connect.
- Go to Settings, then System, then Power & Battery, and tweak the sleep options.
- So the PC stays ready and available when it’s needed.
Step 5: Allow a Specific User (Optional)
- Fifthly, by default, your administrator account can connect.
- To add other users, do this:
- Click Remote Desktop Users.
- Then select Add.
- Enter the username.
- Click OK.
- This is useful when a handful of people need access, not just one person depending on the work.
Step 6: Connect from Another Device
- Lastly, use the Microsoft Remote Desktop app on some other Windows computer, Mac, iPhone, or Android device.
- Put in your PC name, and then sign in using your Windows credentials.
- After a few seconds, your desktop shows up instantly.
Security Tips
Remote access is pretty powerful, so you should protect it carefully.
Just follow a few good tips:
- Use a strong password, not something simple.
- Turn on two-factor authentication for your Microsoft account.
- Keep Windows updated regularly.
- Only let trusted people in, no random guests.
- Shut down Remote Desktop when you are not using it.
Conclusion
In conclusion, the remote desktop is one of Windows 11’s most useful, built-in tools. It allows users to work on their computer even away from it. With just a few, simple steps, you can securely control your PC from another device. So, turn it on and you’ll get a smoother way to reach your computer whenever, wherever you need it. For more on this topic, browse our Windows tips.